Sunday, August 14, 2011

How to Configure Outlook??

Hotmail POP3 email setting

Windows Live offer Free POP3 access to Hotmail

Below is the POP3 setting.

POP server :
pop3.live.com (Port 995)
POP SSL required : Yes
User name: Your Windows Live ID, for example yourname@hotmail .com
Password: The password to sign in to Hotmail or Windows Live
SMTP server: smtp.live.com (Port 25)
Authentication required: Yes
TLS/SSL required: Yes


  Gmail POP3 email setting

Windows Live offer Free POP3 access to Hotmail

Below is the POP3 setting.

POP server :
pop3.gmail.com (Port 995)
POP SSL required : Yes
User name: Your G-mail ID, for example yourname@gmail .com
Password: The password to sign in to gmail
SMTP server: smtp.gmail.com (Port 465)
Authentication required: Yes
TLS/SSL required: Yes


How to configure your Outlook GMail account 


dots Why should I use Outlook for my Gmail address?


Although the web based system of Google Gmail is one of the most feature rich webmail platforms, you may want to handle your Gmail account & messages from a client email software program such as Microsoft Outlook. For example, if you are using other email addresses and not just the Gmail account, most likely you would want to read and handle all your email accounts from the same interface & program.

Configuring the Outlook Gmail settings.

You can configure Outlook to handle your Gmail account as a POP3 or as an IMAP account. Depending on your choice, you have to enable the related account option in your Gmail account (Gmail Settings -> Forwarding and POP/IMAP).


  • Below, we will detail how to setup Microsoft Office Outlook 2000 to 2010 to send, receive and store email messages for a Gmail address. Before getting started, please make sure you know your Gmail email address and your Gmail password.


  • Start Outlook: from the main Outlook window, go to Tools -> Email Accounts.
    selecting the Outlook email accounts for Gmail
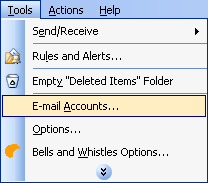
    On the Outlook popup window, select to "Add a new e-mail account" and click on Next.
    Outlook add email account
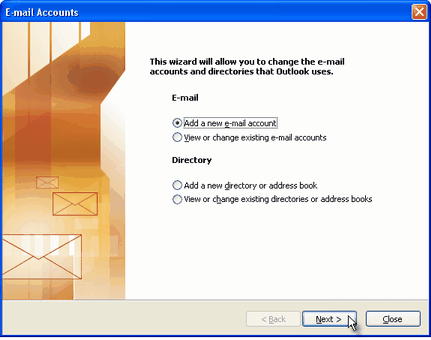
    On the server type step, select POP3 or IMAP (depending on your needs) for the Outlook email account type, then click on Next. There is no need to select the IMAP type, because the Gmail web based account will anyway keep a copy of all emails, just like an IMAP account would do.
    gmail pop3 for outlook
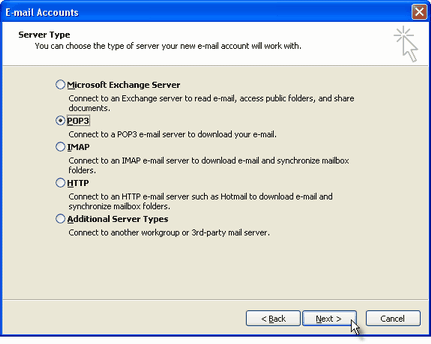
    On the next screen, you will have to specify your Outlook Gmail settings, such as your Gmail username and password, Gmail server addresses, Gmail server ports and Outlook Gmail display name.

  • On the User Information section, enter your Name (it can be anything, but remember this is going to be the name/text that people will see when you will send them an email via your Outlook Gmail account) and your Gmail email address.


  • On the Server Information section, enter the Google Gmail servers:

    POP Gmail servers for Outlook:
    - Incoming mail server: pop.gmail.com
    - Outgoing mail server: smtp.gmail.com.

    IMAP Gmail server for Outlook:
    - Incoming mail server: imap.gmail.com
    - Outgoing mail server: smtp.gmail.com.

    As an alternative, you may setup any other outgoing mail server that you have access to, such as your ISP's SMTP server or your own hosted outgoing server. However, if you setup a 3rd party outgoing mail server, you will not have access to sent emails via your web based Gmail account panel.


  • On the Logon Information section, enter your Gmail User Name (which is the same as your Gmail email address) and your Gmail password. Tick the box "Remember password" in order to make Outlook to store the Gmail password, so it will not ask you about it every time when Outlook will send/receive emails for the Gmail account.


  • Click on the "More Settings" button and go to the "Advanced" window tab.

    If you use Gmail as a POP Outlook account:
    - On the "Incoming server (POP3)" field, enter 995 and mark the box "This server requires an encrypted connection (SSL)";
    - On the "Outgoing server (SMTP)" field, enter 465 and mark the box "This server requires an encrypted connection (SSL)".

    If you use Gmail as an IMAP Outlook account:
    - On the "Incoming server (IMAP)" field, enter 993 and mark the box "This server requires an encrypted connection (SSL)";
    - On the "Outgoing server (SMTP)" field, enter 587 and mark the box "This server requires an encrypted connection (TLS)".

    For both POP and IMAP, you also have to enable the option "My outgoing mail server requires authentication" from the Outgoing Server tab.

    You can also change the server timeouts period: this defines the time interval for which Outlook will wait to establish a Gmail connection, before triggering a connection error. The slower your Internet connection is, the greater period you should put.
    The "Delivery" options are not important for an Outlook Gmail account: no matter what you would change here, Gmail will always keep a copy of each email on the Gmail server.

    outlook gmail servers
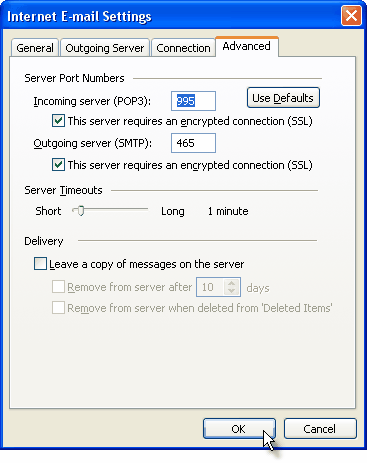
    When you are done setting up your Outlook Gmail advanced settings, click on OK to return to the Outlook Gmail account window.

    gmail for outlook To verify your Outlook Gmail setup, click on the "Test Account Settings" button: this will make Outlook to attempt to login to your Gmail account and to send & receive an Outlook test email. If the test will succeed, you will notice the test email in your Outlook Inbox folder. If the test fails, Outlook will prompt you with the error messages - most likely, you didn't setup the correct server settings or the Gmail password is wrong.


  • ------------------------------------------------------------------------------------------------------------------
    How to configure MS Outlook 2007 ?
    All the Steps(Text) as above - Only Options will change (Here only Graphical View)


     It will definitely Help you. AMIT KOTHARI

    Tuesday, August 9, 2011

    Install XP in Flash Drive(USB)

    How to prepare bootable XP setup on USB-Drive.


    Notes:


    • USB Flash Drive must be with at least 1GB of storage.


    Download USB_MultiBoot 10 and unpack it with 7-zip. Plug USB Flash Drive (we will call it later USB-Drive) to one of USB ports.


    Go to path where you extracted USB_MultiBoot_10 and double click ' USB_MultiBoot_10.cmd ' file.
    Next press any key on keyboard.

    01.png

    In this step you will decide how to format USB-Drive.

    02.png

    Select PeToUSB method by pressing ' p ' and then ' Enter ' key.

    03.png


    PeToUSB window will show up.
    Do not change there anything (use default settings) and click ' Start ' button.

    04.png

    Choose ' Yes '.

    05.png

    Select ' Yes '.

    06.png

    Click ' OK '.

    07.png


    Choose ' Close '.

    08.png

    Now you will have to set few things.

    09.png

    Hit ' 1 ' and then ' Enter ' key to select a folder with XP files.

    10.png


    In below example it's in D:\Windows_XP_Professional_SP3_En path.
    Confirm choice by selecting ' OK '.

    11.png

    Now you will add few basic informations to Windows XP setup.
    Choose ' Yes ' to start this process.

    12.png


    13.png


    14.png

    Note:
    Below Product Key is fake.
    Real key you'll find at the bottom of the laptop on a sticker (if it's with OEM licence) or if you used retail copy then in box with it.

    15.png


    16.png


    17.png


    18.png


    19.png


    20.png

    You'll see a summary of entered data.

    21.png

    Press ' 2 ' and then ' Enter ' key to select USB-Drive.

    22.png

    In below example it's visible as ' Removable Disk (U) '.
    Confirm choice by selecting ' OK '.

    23.png

    Hit ' 3 ' and then ' Enter ' key to make bootable XP setup USB-Drive.

    24.png

    Choose ' Yes '.

    25.png


    Select ' Yes '.

    Note:
    This will ensure that the system partition will be with C letter.

    26.png

    You may press any key on keyboard to finish the whole procedure.

    27.png


    How to install XP from prepared bootable USB-Drive.


    Plug the USB-Drive to your netbook / notebook USB port and turn it on. Press F10 / Delete at startup to enter BIOS.
    Go to:


    System Configuration -> Boot Options -> Boot Order


    and set ' USB-Drive ', ' USB Hard Drive ', ' USB Flash ' or ' USB diskette on key ' as first booting device. Remember to save this changes before you will leave BIOS.

    01.png

    After restart you will see start menu. Use ' up arrow ' key to select option 1

    02.png

    and press ' Enter ' to confirm this choice.

    03.png

    Windows XP setup will show up.


    04.png

    Press ' Enter ' to continue.

    05.png

    Now you will see all existing partitions and unpartitioned space on HDD.


    In below example we have on list USB-Drive with U letter and 76 GB of unpartitioned space.
    I will create now two partitions. One will be for XP system (40 GB) and second for data (36 GB).
    To do this I need to press ' C ' key.

    Of course you should make it according to your needs.

    06.png


    You've created partitions. Select partion with letter C and press ' Enter '.
    In this way you decided that on this partition will be installed XP.


    07.png


    Choose ' Format the partition using the NTFS file systems ' and hit ' Enter '.

    08.png

    Process of formatting the partition has began.

    09.png


    Wait for restart or hit ' Enter ' to make it quicker.

    10.png

    This time select here option two or don't do anything - it will be choosen by default.

    11.png


    12.png

    Windows XP installation process will begin now.

    13.png


    14.png

    Choose option 2 or wait for default choice.

    15.png


    16.png


    17.png


    Windows XP welcome screen will show up.

    18.png

    Congratulations! XP system is finally installed on your machine.

    19.png

    Finally you may safely remove USB-Drive and start installing drivers for this system.

    From : AMIT KOTHARI